Capture and relive beautiful moments with our advanced video maker application, designed for both enthusiasts and professionals. Immerse yourself in the nostalgia of memories by effortlessly creating videos with our user-friendly interface.
One standout feature is the ability to merge video clips seamlessly. The professional-grade video cutter and joiner bring additional functionality, allowing you to rotate, crop, compress, and combine videos without compromising quality. Trim video lengths to your preference, apply edits for enhancement, and add music to create a more immersive experience. The application also offers the flexibility to slice and split videos into two separate clips, extract MP3 from video files, and craft captivating slideshows from your photo collection, complete with transition effects like Wipe, directional blur, hue rotation, and more. Notably, our application respects your creativity by not adding watermarks to your creations.
Key Features:
Versatility: Suitable for both amateurs and professionals, our application stands out among pro-YouTube video editors, TikTok editors, and slideshow maker apps.
Filters: Experience a plethora of astonishing filters, including moonlight, blues, and more. Apply these rich and trendy filters to add a unique touch to your videos.
Canvas Sizes: Tailor your videos for different social media platforms with various canvas sizes, including 16:9, 1:1, 9:16 (TikTok), 4:5 (Instagram), and more.
Overlays: Choose from a variety of overlays in the interface to further enhance and personalize your videos.
Download our amazing application now and embark on a creative journey like never before.
Step 1:- Launch the application on your device and click on the slideshow option to create a slideshow of the photos or videos. Once it opens up, choose a number of photos or videos that you wish to make a slideshow of.
Step 2:- Enhancing Visual Appeal
Navigate to the “Effects” option in the toolbar, offering an array of beautifying filters to elevate the aesthetic quality of your photos or videos.
Choose from a diverse range of inbuilt format and resolution options tailored to your preferences.
To create a slideshow, access the main menu and select the dedicated slideshow option. Pick images from your computer to initiate the slideshow creation process.
Customize your slideshow by adding effects, music, stickers, themes, text, and transitions. Adjust the timing for each element’s appearance to create a visually engaging experience.
Utilize the “Duration/Record” option to seamlessly incorporate additional pictures into your slideshow while adjusting the time duration for each slide.
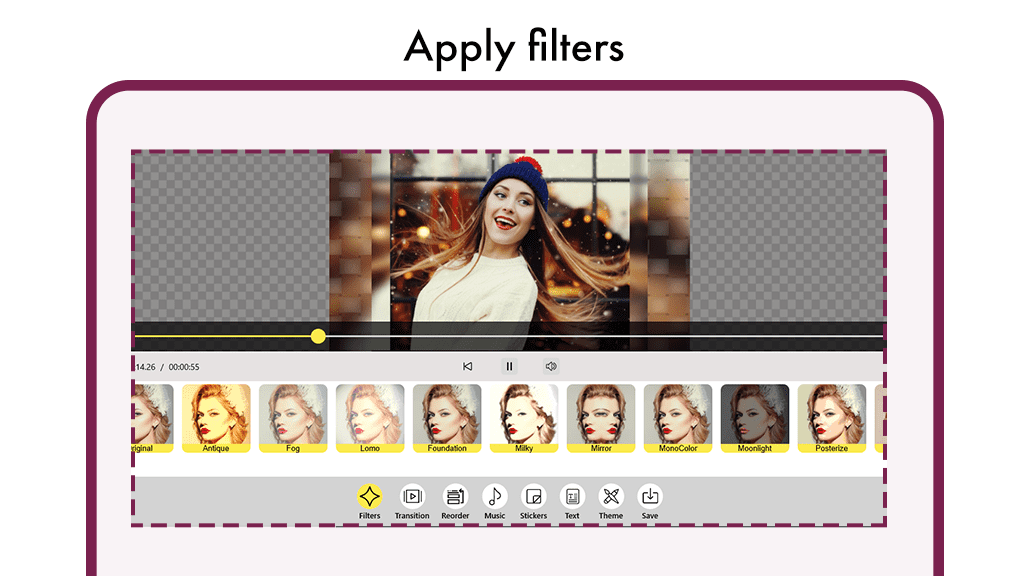
Click on the “Effects” button to access a variety of filter effects for your slideshow video.
Experiment with different filter effects such as Alone, Fog, Pink, Black and White Lomo, Fresh, Blues, Beauty, Sepia, Foundation, Magicpen, Mirror, Mono Color, Moonlight, and more.
Simply click on your chosen filter effect to instantly visualize the changes on your slideshow video.
Step 3:- Crafting Seamless Transitions for Your Slideshow
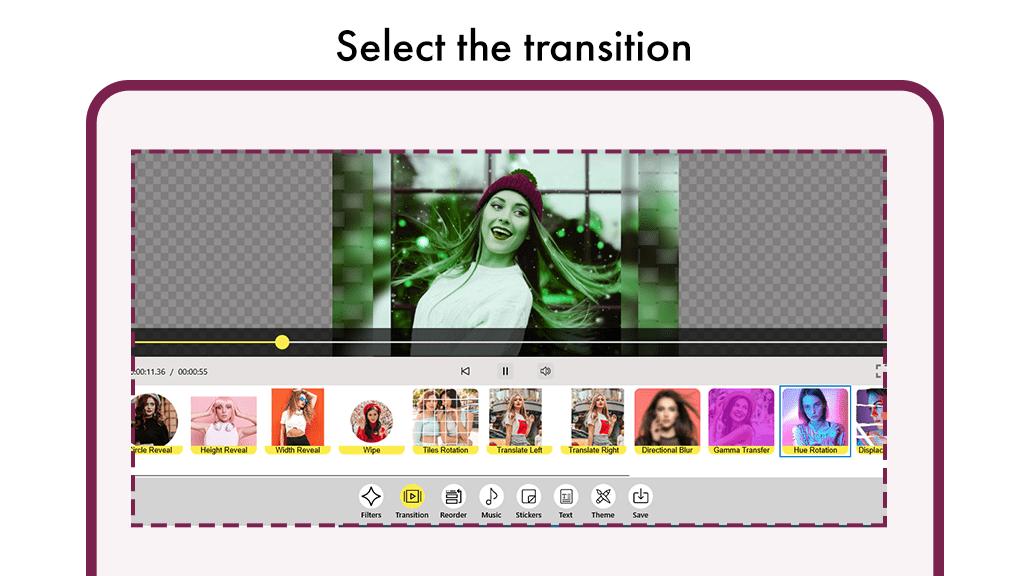
Access the “Slideshow Transition” feature by clicking on the Transition button.
Recognize that transitions act as the cohesive element, binding your slideshow into a captivating visual narrative. Think of them as the essential ingredient that transforms your video from mundane to mesmerizing.
Within the Transition menu, carefully select the desired transition effect. Each transition adds a unique touch, enhancing the overall viewing experience of your slideshow.
Click on the next tool to proceed, ensuring a smooth transition from one element to another in your video.
Step 4:- Fine-tuning Your Slideshow Presentation
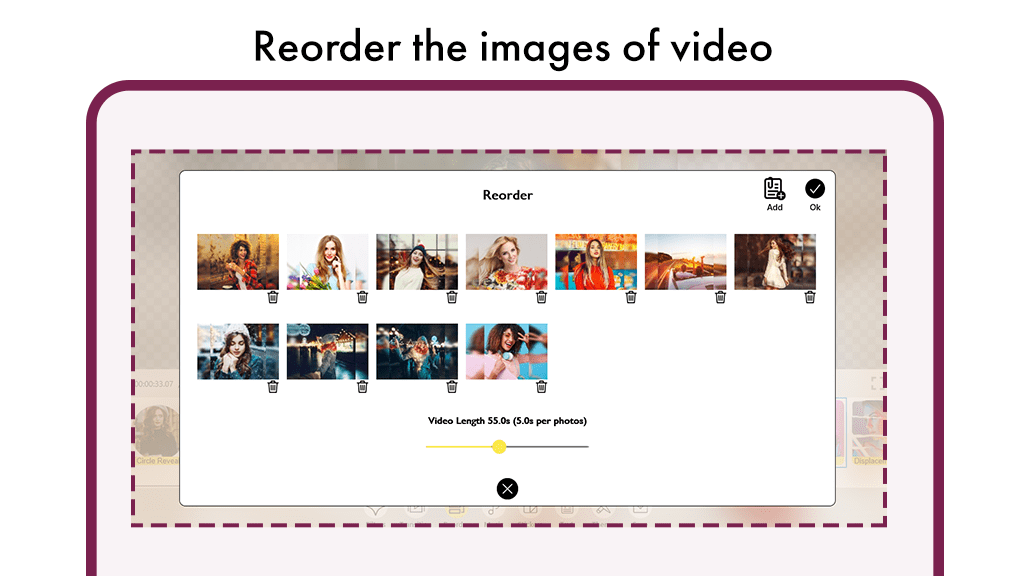
Access the “Duration/Record” button to finely adjust the time duration of your slideshow video and arrange the sequence of photos.
Within this feature, you have the flexibility to add or remove slideshow photos and rearrange the position of slides according to your preference.
Utilize the drag function to the left or right to seamlessly set the desired slideshow time duration.
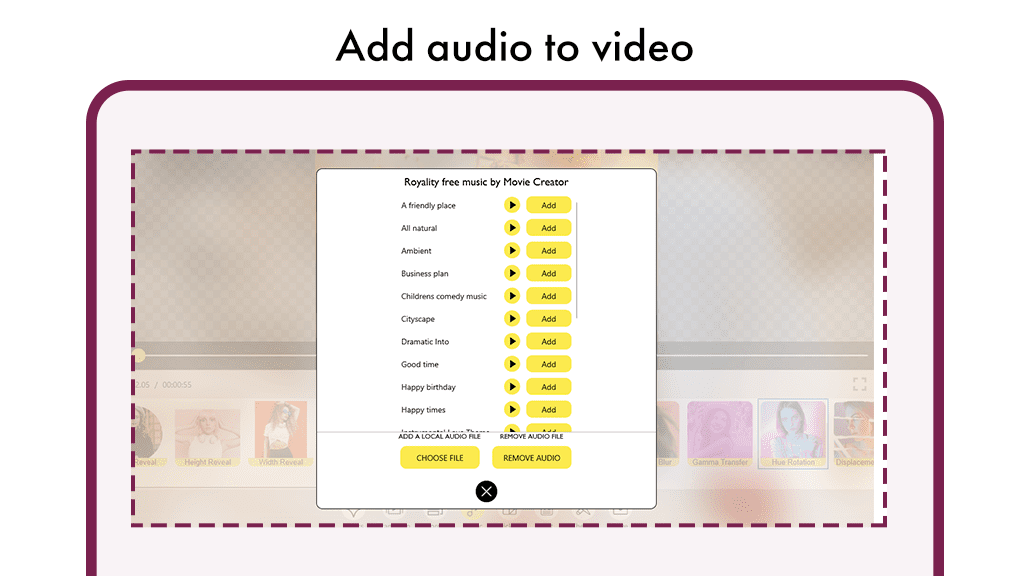
Step 5:- Enhancing Your Slideshow with Music
Navigate to the “Music” button to seamlessly integrate music into your slideshow video.
Recognize the significance of music in elevating your slideshow; it adds a layer of emotion and completeness to the visual narrative.
With the movie creator slideshow feature, craft the perfect slideshow video by selecting and adding music that complements the mood and theme of your presentation.
Step 6:- Infusing Fun and Creativity with Stickers
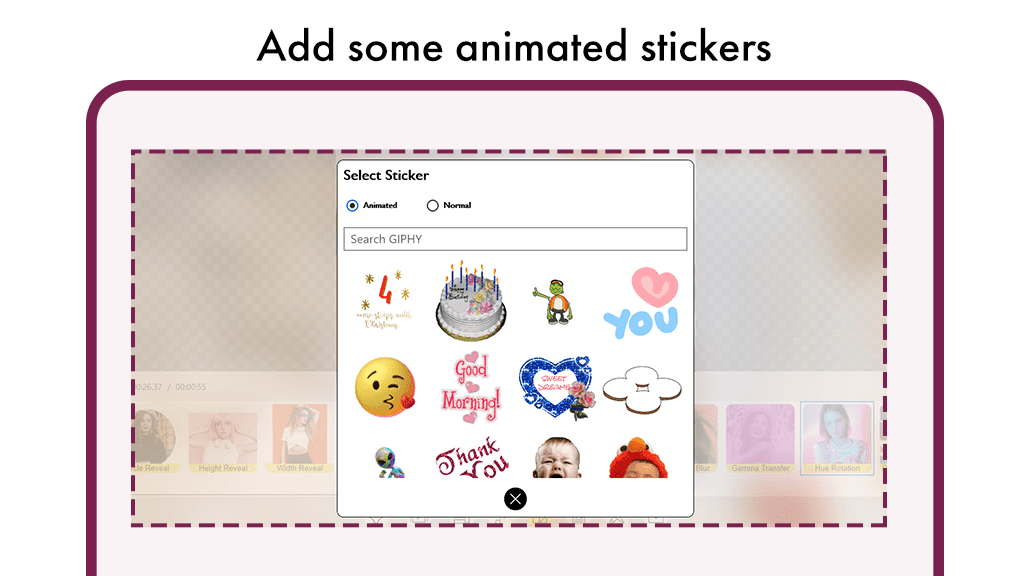
Click on the “Stickers” button to embark on a journey of adding amazing and cool stickers to your video.
Upon selecting the stickers button, a plethora of funny and cool sticker options will appear on your screen, offering a range of creative possibilities.
Browse through the collection and click on the stickers that resonate with your style and enhance the visual appeal of your photo or video.
Step 7:- Adding Text Highlights to Your Video
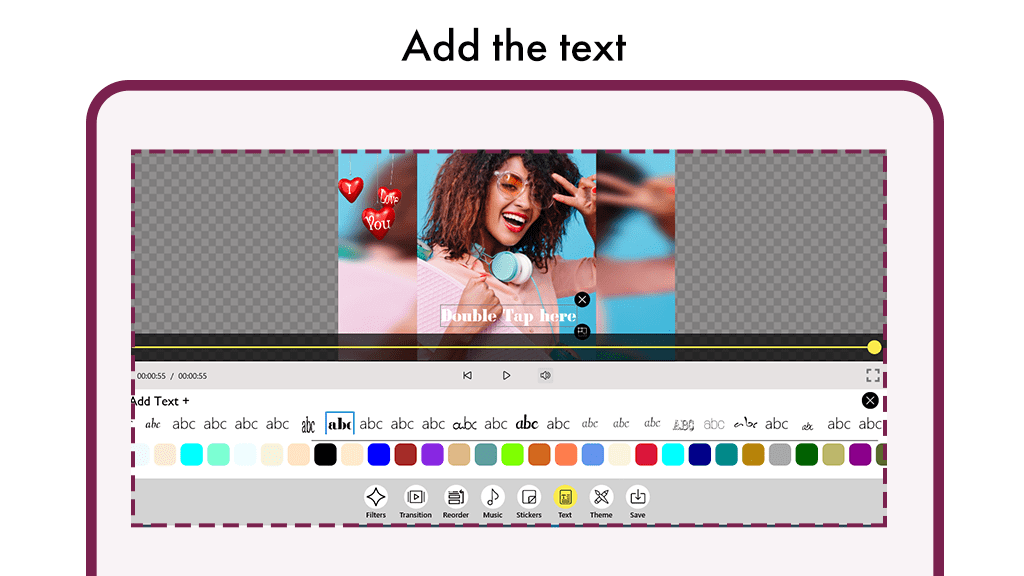
On the editing screen, discover our versatile “Add Text” feature designed for incorporating highlights, captions, logos, or any text element seamlessly into your video.
To utilize this feature, click on the “TEXT” option. You will be presented with a variety of fonts to choose from.
Select a font that aligns with your style and complements the background, adding significant value to your video.
Once you’ve chosen your text style, input your content into the box that appears on the screen.
Click on “accept” to save the content, and if desired, customize the text color from the array of shades provided below.
Step 8:- Elevating Your Slideshow with Theme Effects
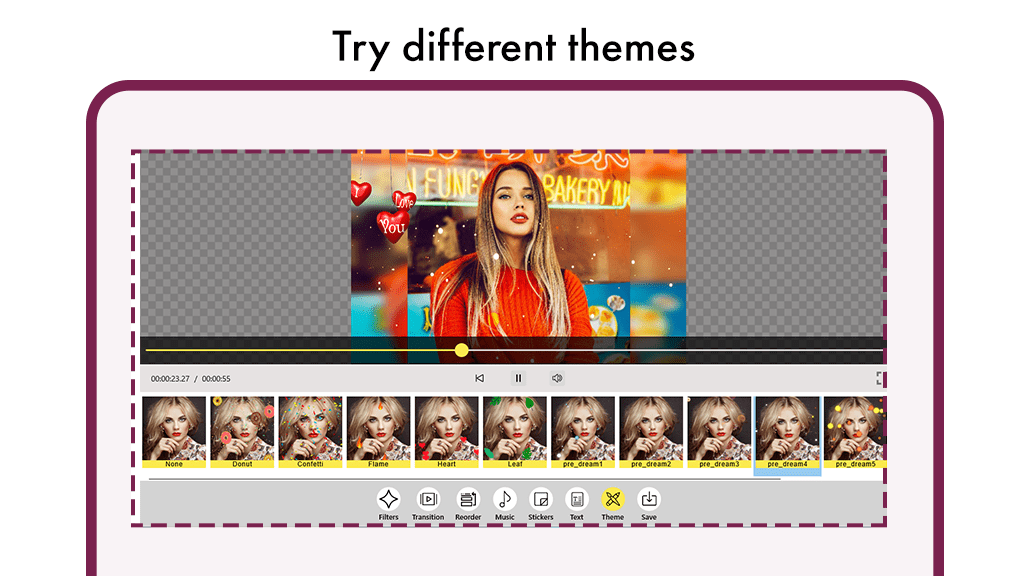
Introducing a dynamic feature – the ability to apply live video theme effects, transforming your slideshow into a visually stunning masterpiece.
To embark on this creative journey, click on the “Theme” button, unlocking a plethora of amazing theme effects designed to enhance your slideshow video.
Explore the array of theme options and select the one that resonates with the mood and theme of your content.
Witness your slideshow undergo a captivating transformation as these theme effects add an extra layer of visual appeal and coherence to your creation.
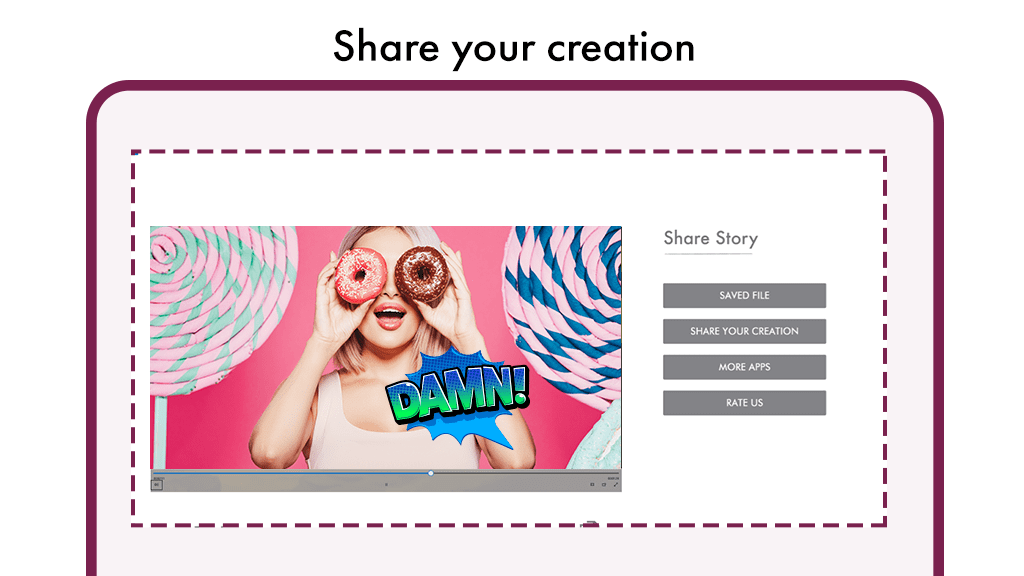
Step 9:- Saving, Viewing, Sharing, and Exploring More
Once your creative work is complete, click on the “Save” button to store your edited video directly into your gallery.
Want to locate your masterpiece? Simply click on the “Open Folder” button to view the file location and access your edited video effortlessly.
Sharing your creation is as easy as clicking the “Sharing” button, allowing you to share your edited video with friends, family, or your audience on various platforms.
Looking for more amazing apps? Click on the “More Apps” button to explore and download additional applications that can further enhance your creative endeavors.
