Beauty Plus - Makeup Photo Editor
Beauty Plus – Makeup Photo Editor: Elevate your photos with creative makeup options using this app. With multiple one-click beautification options, touch up your unique snapshots effortlessly. Apply filters to enhance your images.

Beauty Plus – Makeup Photo Editor: Enhance your photos effortlessly with creative makeup options using this app. With multiple one-click beautification choices, refine your unique snapshots. Apply filters to elevate your images.
How to Use:
Make your selfie superb in a snap.
- Capture a beautiful selfie and apply the best filters.
- Edit the photo using multiple photo editing options.
- Adjust effects (brightness, contrast, etc.) freely.
- Explore the latest in fashion makeup instantly.
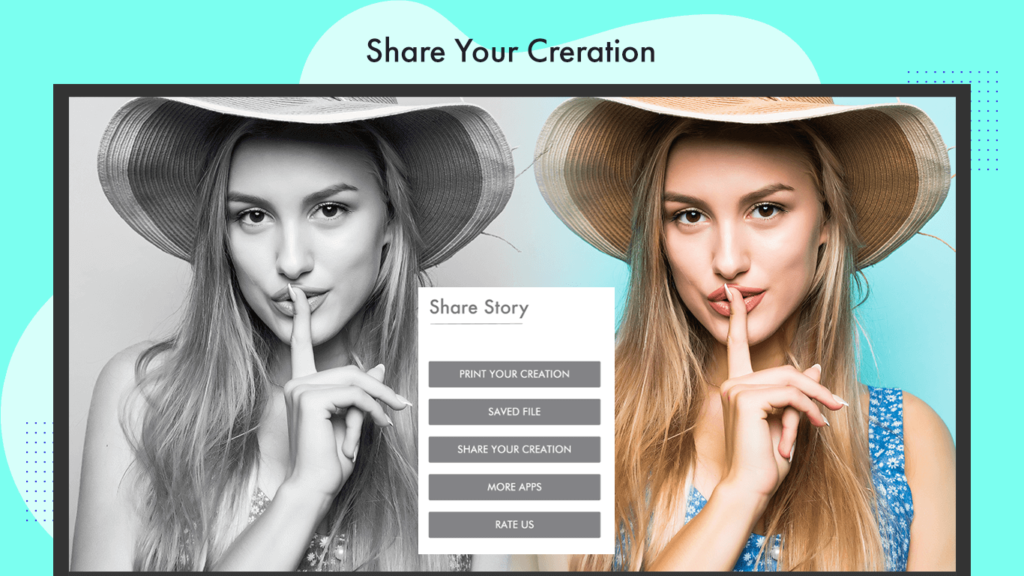
Save and share your images on social networking platforms like Instagram, Facebook, Twitter, and more.
Create your stylish, elegant look with features never before available in any other apps. Enjoy Pretty Makeup with Beauty Plus – Makeup Photo Editor and its amazing makeup effects.
Instant Snap Feature:
- Got great lighting but not a good front camera? No worries! Our brilliant selfie filters have you covered.
- Apply attractive filters and click as many selfies as you like.
- Capture photos instantly with your device’s camera and lovely overlays.
Instant Snap Steps: Step 1: Click on the first option as soon as you launch the app.
- A small camera window will pop up. Adjust it for the best angle and capture your photo.
Step 2:- Alternatively, click on the small Edit icon after launching the app. Select your picture to start editing.
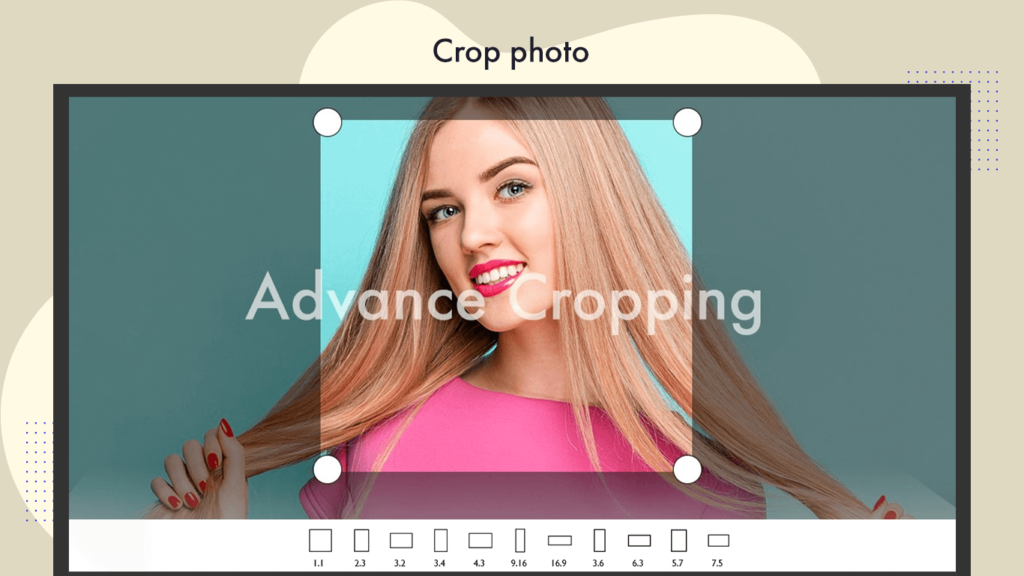
Step 2:- After selecting the picture, your screen will display four circles on each corner of the image. Move these circles to choose the area of the picture you want to crop. Once satisfied, click the “CROP” button located just below your picture to finalize the process.
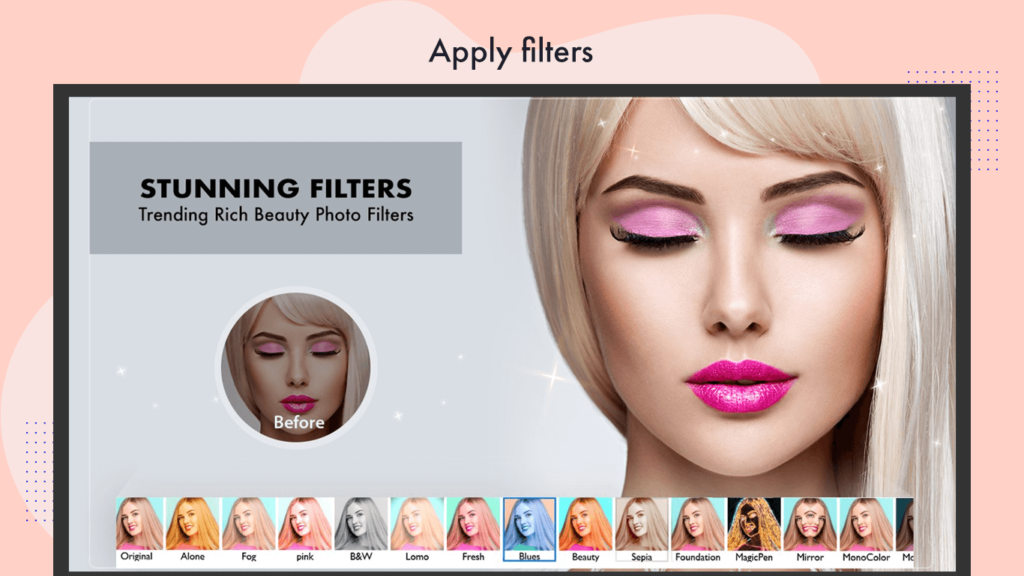
Step 3:- Right below your picture, you’ll find various options. The second option from your left is the “FILTER OPTION”; click on it.
- After clicking, a variety of filters will appear at the bottom of your screen. Choose the one you desire, and when you’re satisfied, click the check icon in the bottom right corner to apply the filter.
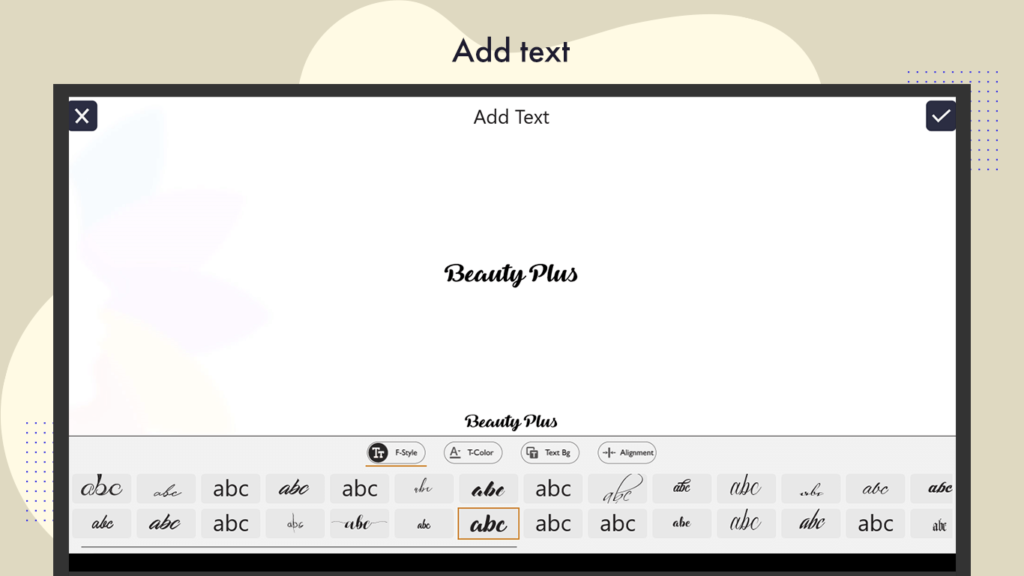
Step 4:- Click on the “ADD TEXT” option, and you’ll see the “ENTER TEXT’’ dialogue at the top of your screen. Just below that, there will be a space for you to type your text.
After typing your text, explore different fonts available just underneath it. Additionally:
- To make your text italic or bold, select the options just below the fonts.
- Change the color of the text by choosing from a variety of color options available just below the bold and italic options. Simply click on your desired color.
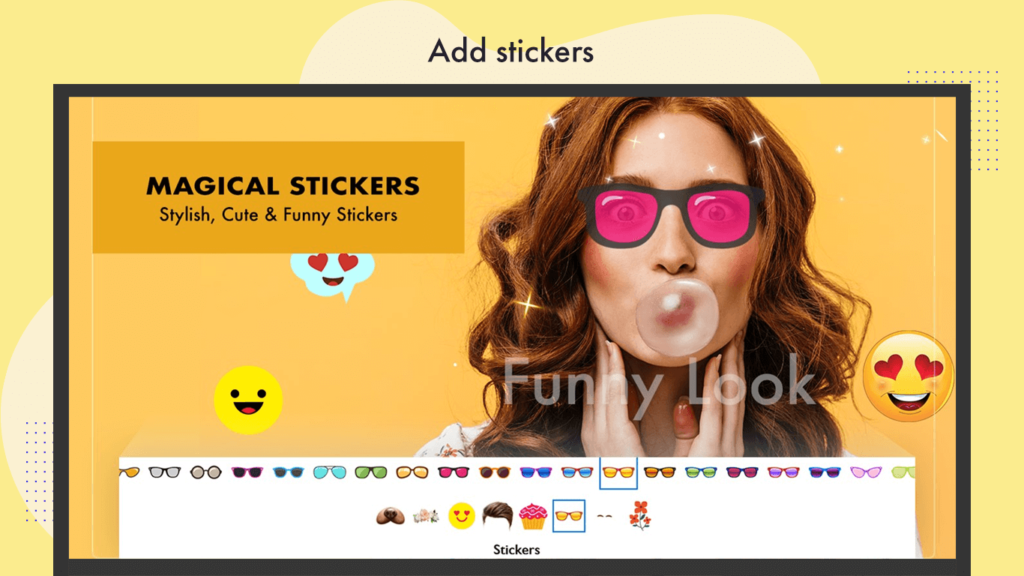
Step 5:- Look for the “STICKERS” option at the bottom of your screen, positioned just beside the “FILTERS” option.
Click on “STICKERS,” and a variety of stickers will appear for you to choose from. Select the sticker you want, and drag it to any part of the photo using your cursor. To adjust the size of the sticker, click on the bottom right icon of the sticker, and hold the left click to resize it.
For rotation, click on the bottom left option of the sticker, and hold the left click to rotate it in the direction you prefer.
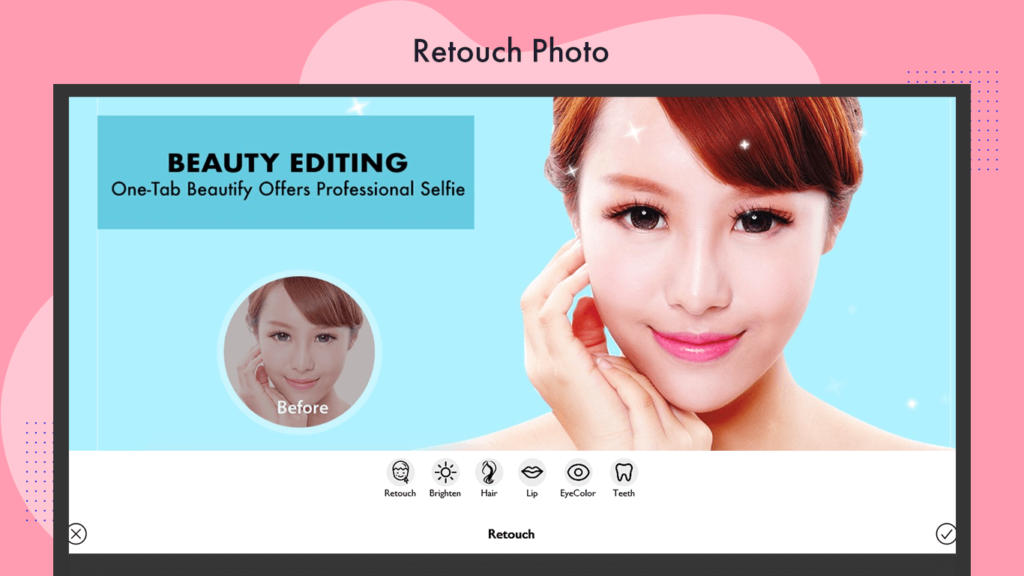
Step 6:- Click on “Retouch” to access the photo editing tools specifically designed for retouching. Use these tools to enhance and refine your photo for a polished look. Adjustments may include smoothing skin, removing blemishes, and refining overall image quality. Experiment with the various retouching options to achieve your desired result.
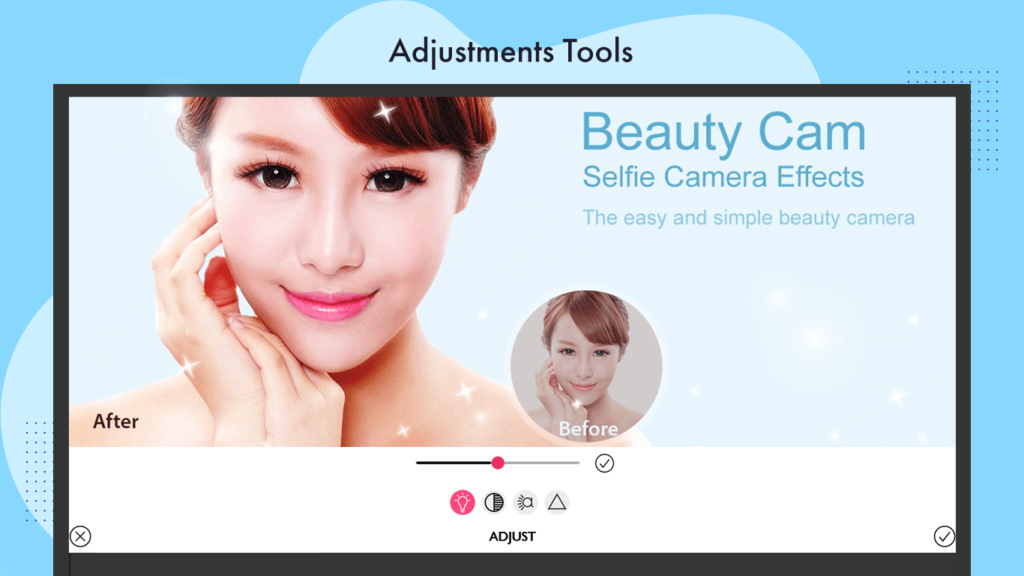
Step 7:- Fine-tune the brightness and overall appearance by navigating to the ‘Adjust’ menu. Here, you can address aspects like vignetting and lighting to achieve the desired visual enhancements. Experiment with these adjustments until you achieve the perfect look for your photo.
Step 8:- Explore the Face Camera photo filters and stickers to craft captivating variations of your face. Instantly add enchanting filters to your images with a single tap. Effortlessly edit your pictures to enhance their beauty and charm.
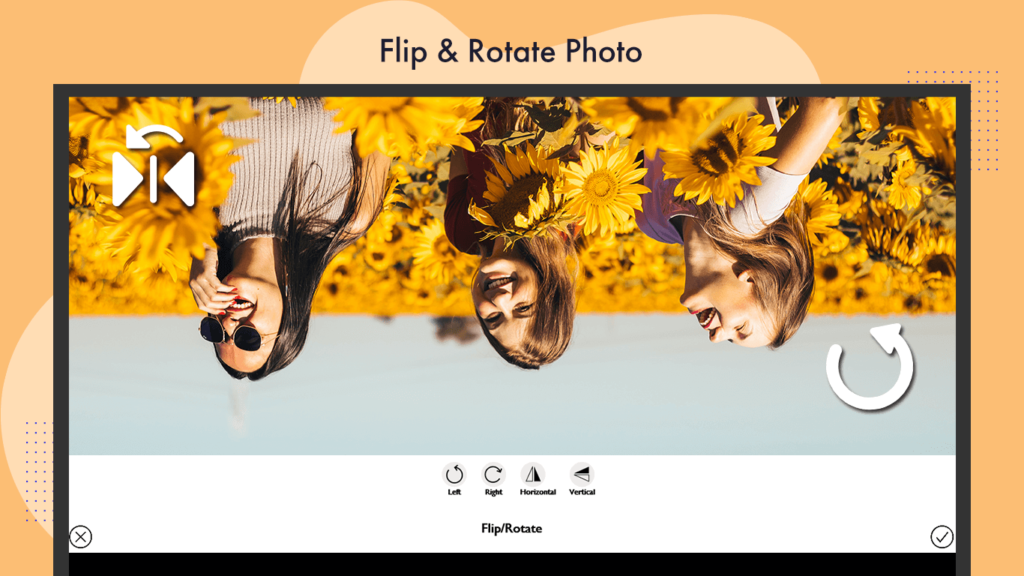
Step 9:- Rotate or flip the image in any direction according to your preference. Explore the innovative ‘Perspective’ tool to transform your original angle, adding a touch of creativity to make your image appear entirely new and unique.
Step 10:- Explore the Mosaic & blur effect tool to apply blur and mosaic effects. Simply select the tool and then choose the area where you want to apply these effects.

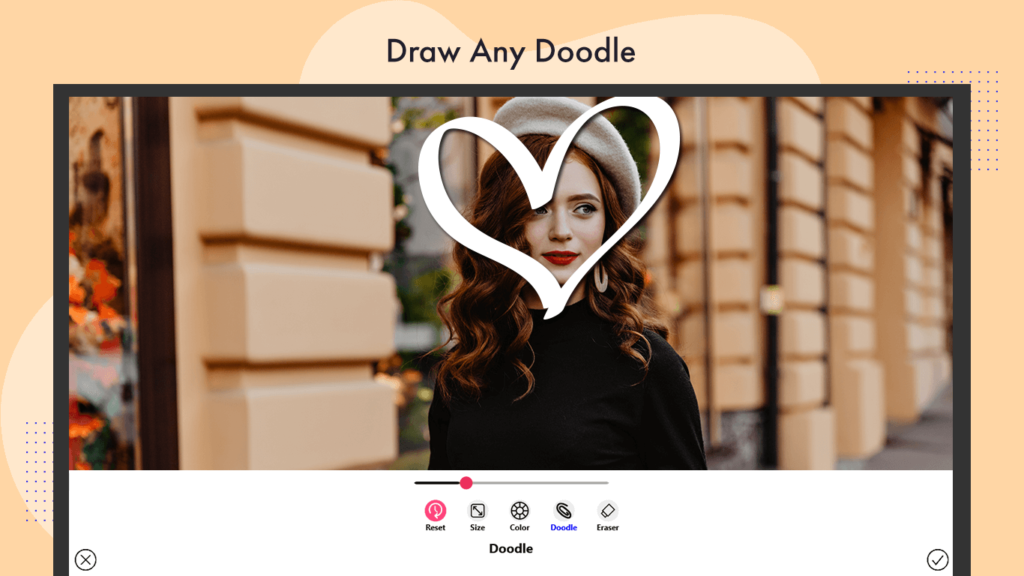
Step 11:- Click on the Doodle button to unleash your creativity and draw colorful doodles on your photo using this amazing tool.
Step 12:- Save the final draft to a local folder and share your masterpiece with friends and family using our multiple sharing options for various social media handles, such as Instagram, Facebook, and more.